STEP 1
Place the chopped chocolate into a mixing bowl and set aside.
STEP 2
Pour the cream into a saucepan and set on a gentle heat to simmer to bring to a rolling boil. Additional flavours can be added to the recipe at this stage by adding dried ingredients like spices to the cream or by replacing some of the cream with liquid ingredients like Amaretto, Coffee or Baileys.
To extend the shelf life add a teaspoon of liquid glucose to the cream ahead of boiling.
STEP 3
Bring the cream to a rolling boil for 20 seconds before pouring swiftly over the chopped chocolate. Place the butter on top and poke it gently under the hot cream.
STEP 4
Allow the chocolate and cream mixture to sit without stirring so that the hot cream can transfer its heat to the chocolate.
DO NOT stir the chocolate too soon, otherwise you will drag cold air into the warm cream, cooling down the whole mixture, usually leading to lumps in the final mix.
STEP 5
Place your hands around the sides of the bowl, when it no longer feels warm to the touch you can give the chocolate a good and thorough stir until fully mixed. You may need to squash the butter against the side of the bowl to fully incorporate without lumps.
STEP 6
Pour your ganache mixture into a piping bag, twist the end of the piping bag to contain the mixture and place in the fridge to firm up a little. 10 minutes should usually be sufficient for the cocoa butter to have cooled. When the mixture holds its shape in the piping bag when squeezed it is ready to pipe.
STEP 7
When I first started making truffles they were all hand-piped and rolled into shape, today at York Cocoa Works our team pipe the ganache into a chocolate shell before finishing for decoration. Hand piped truffles are fantastic for making beautiful creations with simple equipment.
Snip the end of your piping bag and pipe evenly sized splodges of ganache onto a baking tray lined with parchment. Try not to move the piping bag when piping otherwise pockets of air can get trapped leading to a shorter shelf life and mould growth.
Place the tray in the fridge for about 10 minutes to firm up.
STEP 8
Gently push each truffle piece with your fingertips into a ball like shape, try not to use the palm of your hands as they will be quite warm and lead to melting ganache. Try to keep your hands clean and dry when working with ganache, if you have trouble with too warm hands using cocoa powder to dry them a little.
STEP 9
Prepare a bowl of at least 250g of tempered chocolate for decorating
STEP 10
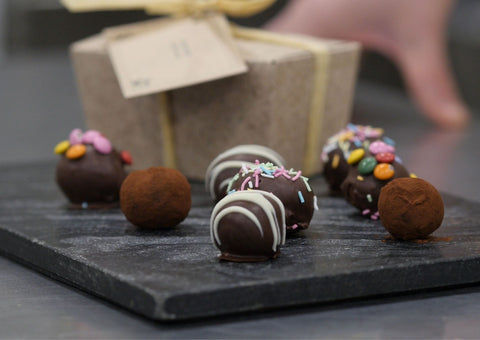
Dip the chocolate truffles in the tempered chocolate by dropping them in and then using a fork to pull the truffle out, try not to stick the fork into the truffle. Tap excess chocolate back into the bowl before depositing the coated truffle onto clean parchment paper, adding a little decoration such as sprinkles, nuts or crumbed biscuits for texture and decoration is a great finishing touch.
Design your own truffles with your own choice of chocolate, flavours, coating chocolate and decorations for contrasting textures and fresh and indulgent flavours.
Customise your Chocolate Truffle Recipe to your own choice of chocolate by adjusting cream to chocolate ratios as follows:
200g of Dark Chocolate : 150ml of Double Cream + 25g Butter
200g of Milk Chocolate : 125ml of Double Cream + 25g Butter
200g of White Chocolate : 100ml of Double Cream - no added butter